Table of Contents
The IronJacamar Eclipse plugin features development tools used for developing resource adapter applications for the IronJacamar standalone distribution, WildFly or JBoss Enterprise Application Platform 6+.
The plugin allows you to
- Generate a resource adapter skeleton
- Generate a deployment descriptor for a resource adapter
- Validate a resource adapter
- Deploy a resource adapter to an IronJacamar server instance
- Deploy a deployment descriptor to an IronJacamar server instance
The plugin is installed by
cp ironjacamar-eclipse.jar $ECLIPSE_HOME/plugins
on Un*x systems, or by
copy ironjacamar-eclipse.jar %ECLIPSE_HOME%\plugins
on Windows.
Open "Window->Preferences" and select the IronJacamar category.
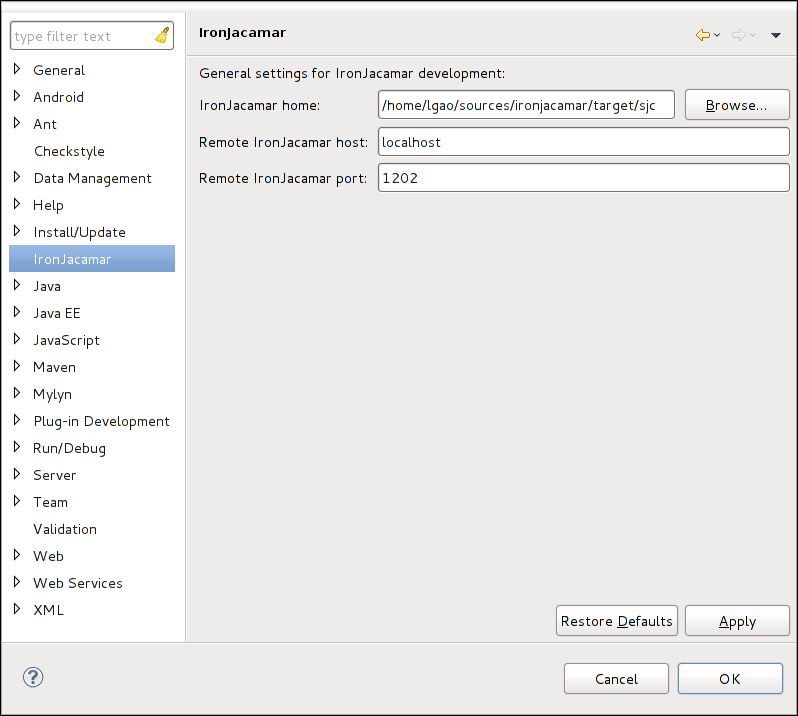
The IronJacamar home setting must point to the root directory of the IronJacamar installation, like
/opt/ironjacamar-1.2.0.Final
in order to configure the plugin.
The IronJacamar Eclipse plugin can deploy to a remote IronJacamar instance, by specifying the host and port settings.
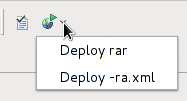
The IronJacamar Eclipse plugin provides a menu with validation and deployment functionality.

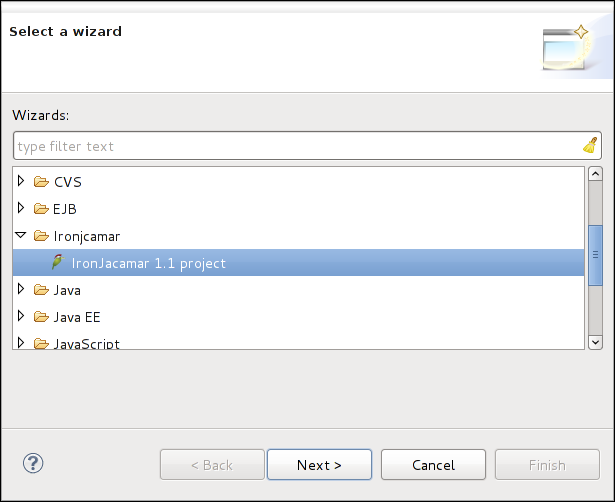
A new IronJacamar project can be created by selecting File->New->Project... and go to the IronJacamar category.
Choose "IronJacamar 1.1 project" and follow the instructions to generate your resource adapter.
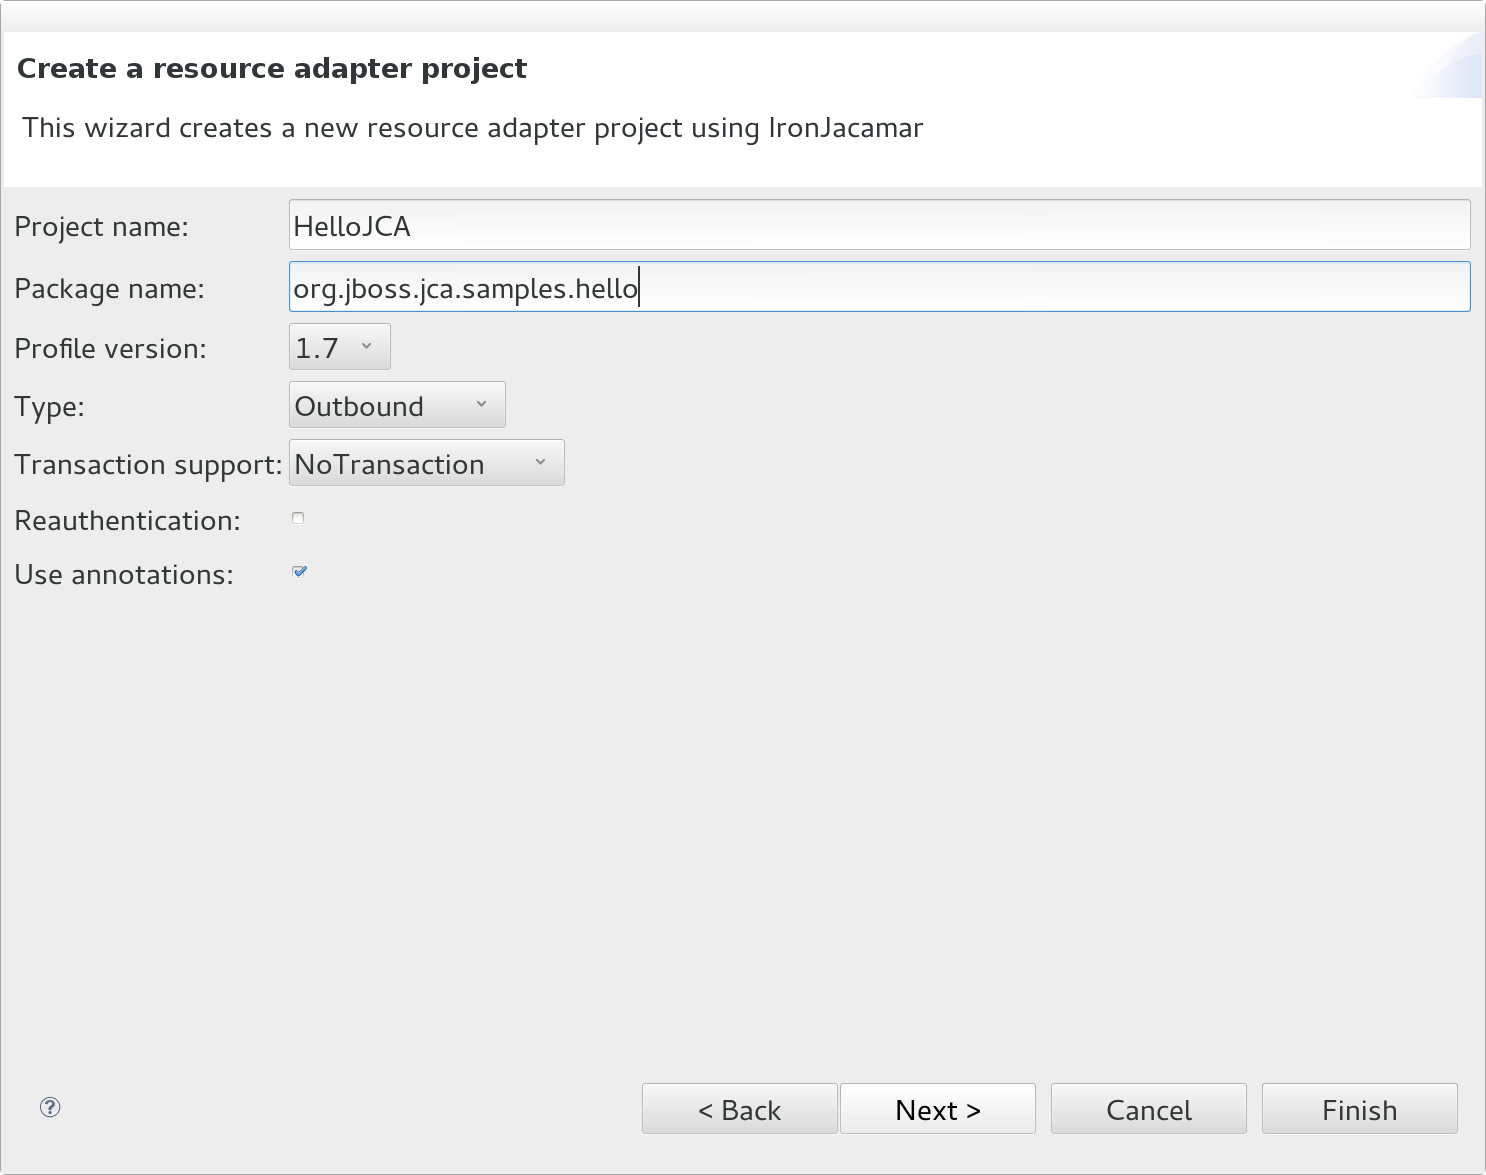
Sepcify the project name and package name for the project. You can also select the JCA specification version, the type of the resource adapter (Outbound/Inbound/Bidirectional), the transaction support level, if the resource adapter will support reauthentication and if annotations used be used for a JCA 1.6+ based resource adapter.
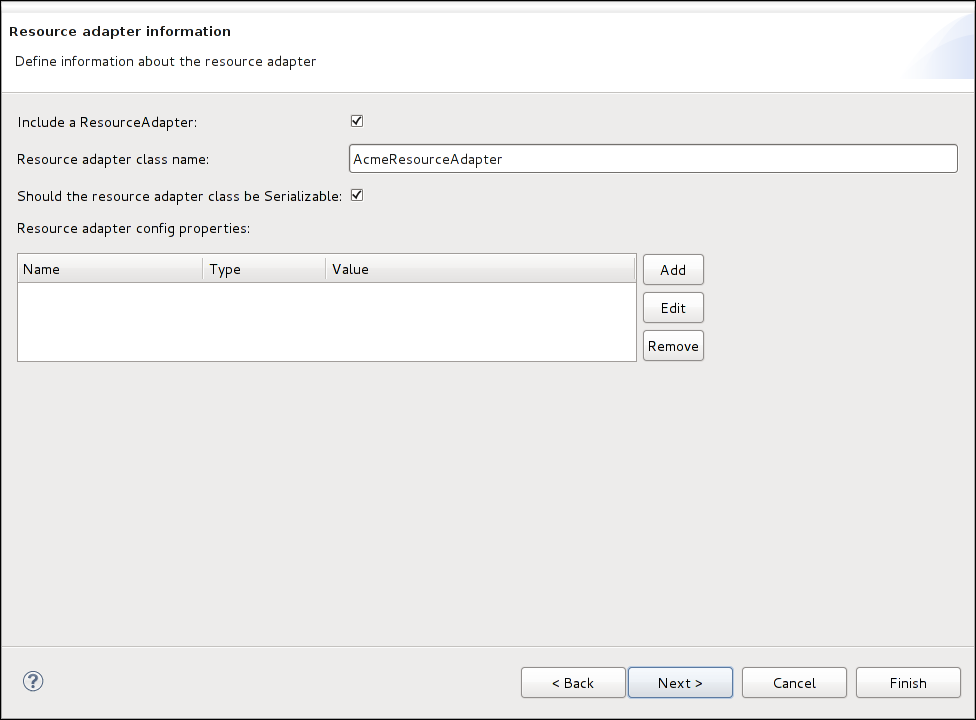
You can choose to include a ResourceAdapter class if the JCA profile version is 1.5, 1.6 or 1.7
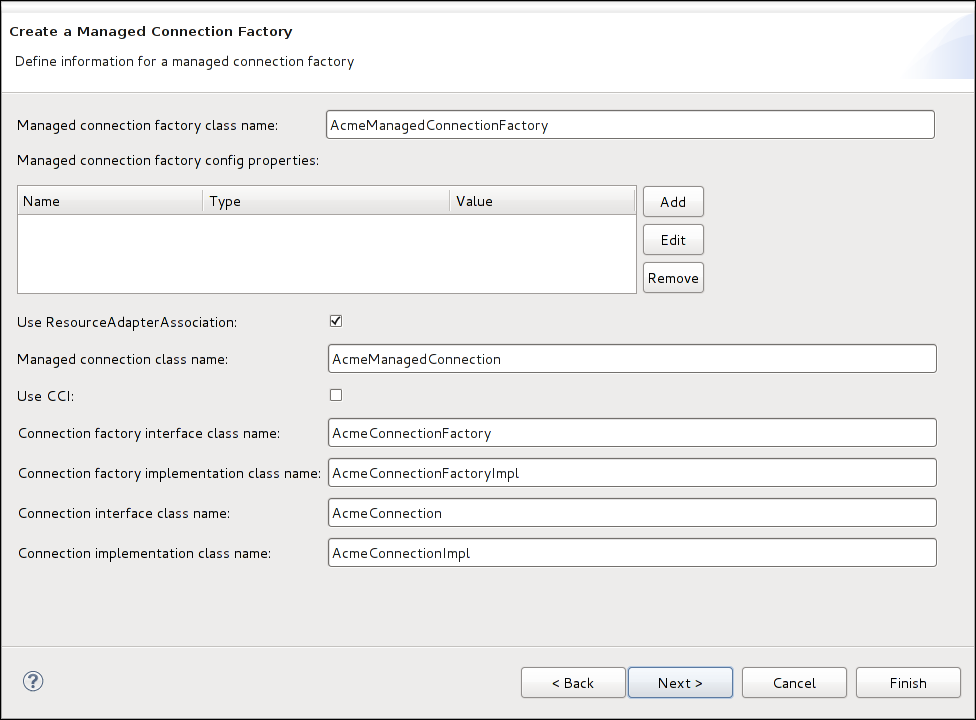
If the project is Outbound or Bidirectional then you can fill in the information for the outbound components.
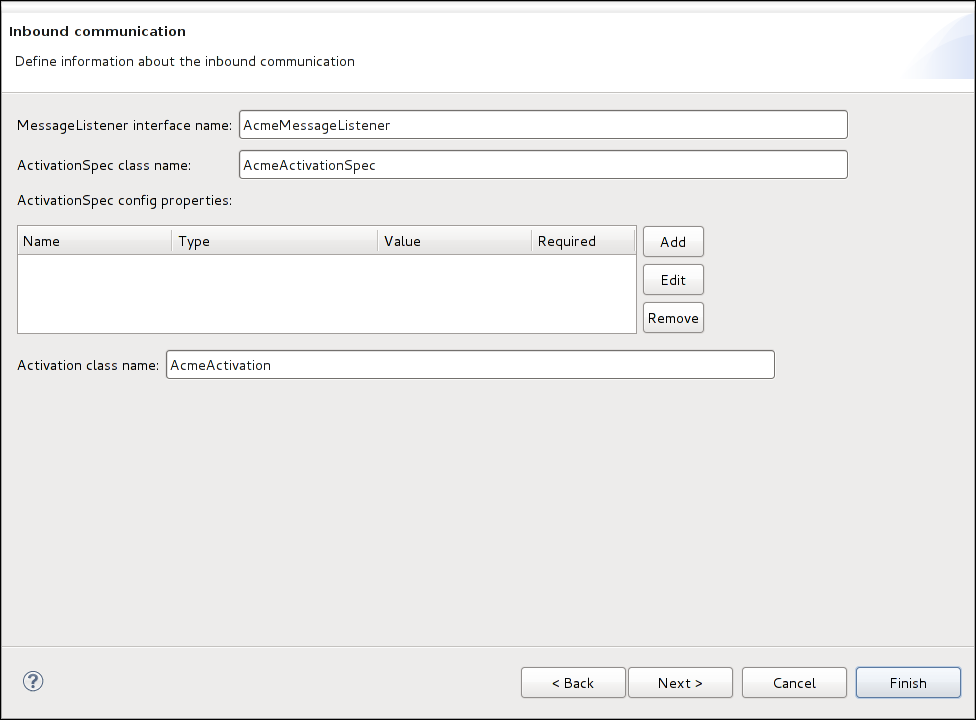
If the project is Inbound or Bidirectional then you can fill in the information for the message listener and activation specification components.
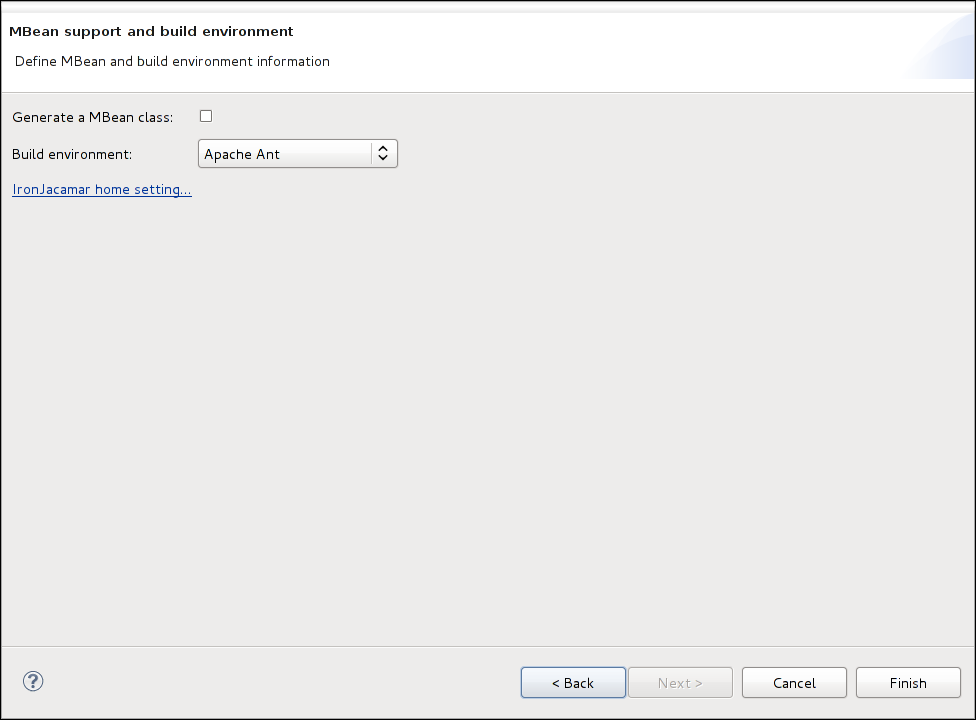
This wizard will let you choose the build environment to use for your project. Currently IronJacamar supports the Apache Ant, Apache Ant + Apache Ivy or Maven build environments. If Apache Ant is selected, all library files will be copied from your IronJacamar installation.
Note
Please make sure you have installed the Eclipse M2E plugin if you select Apache Maven as your build environment.
The IronJacamar project can be validated by selecting it, and the Validate command in the toolbar will now be enabled. Click on the command to validate your project.
Another way to validate the IronJacamar project is to right click on the project, and select IronJacamar->Validate.
The IronJacamar Eclipse plugin provides a way to deploy files to an IronJacamar server.
Note
Before any deploy operation, the IronJacamar server needs to be started, otherwise it will lead to an error dialog. Please refer to this for detail on how to start the IronJacamar server
Select the IronJacamar project you just created. The Deploy drop down command in the toolbar will be enabled. Click on the command and select 'Deploy rar'.
Another way to deploy the RAR file is to right click on the project, and select IronJacamar->Deploy->Deploy rar from context menu
The command will build the RAR file first if it doesn't exist, then try to connect the IronJacamar server to deploy it.
Select the IronJacamar project you just created. The Deploy drop down command in the toolbar will be enabled. Click on the command and select 'Deploy -ra.xml'.
Another way to generate the -ra.xml file is to right click on the project, and select IronJacamar->Deploy->Deploy -ra.xml from context menu.
The command will build the RAR file first if it does not exist, then pop up a wizard to generate the -ra.xml according to the RAR file.
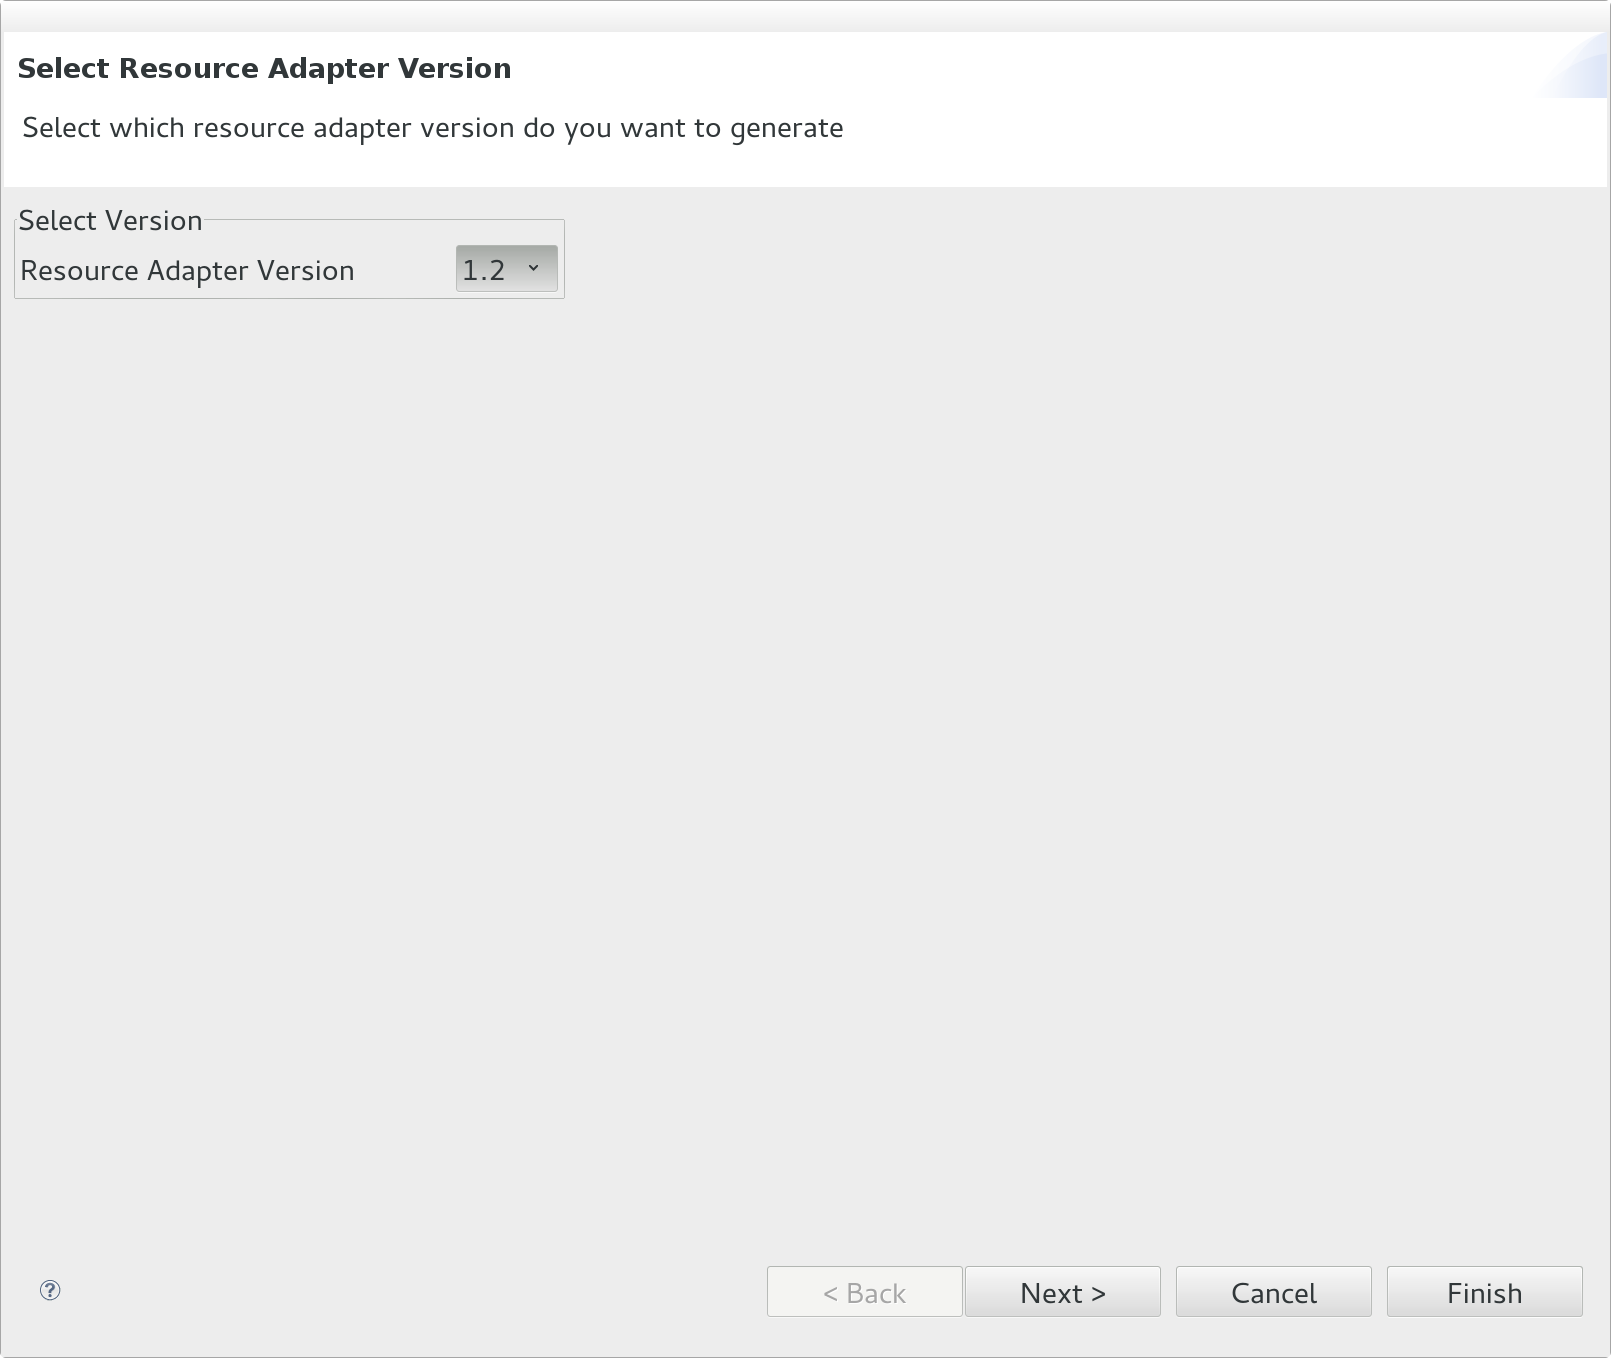
In the first wizard page, selects version of the resource adapter. Some configurations may not be available when version is changed.
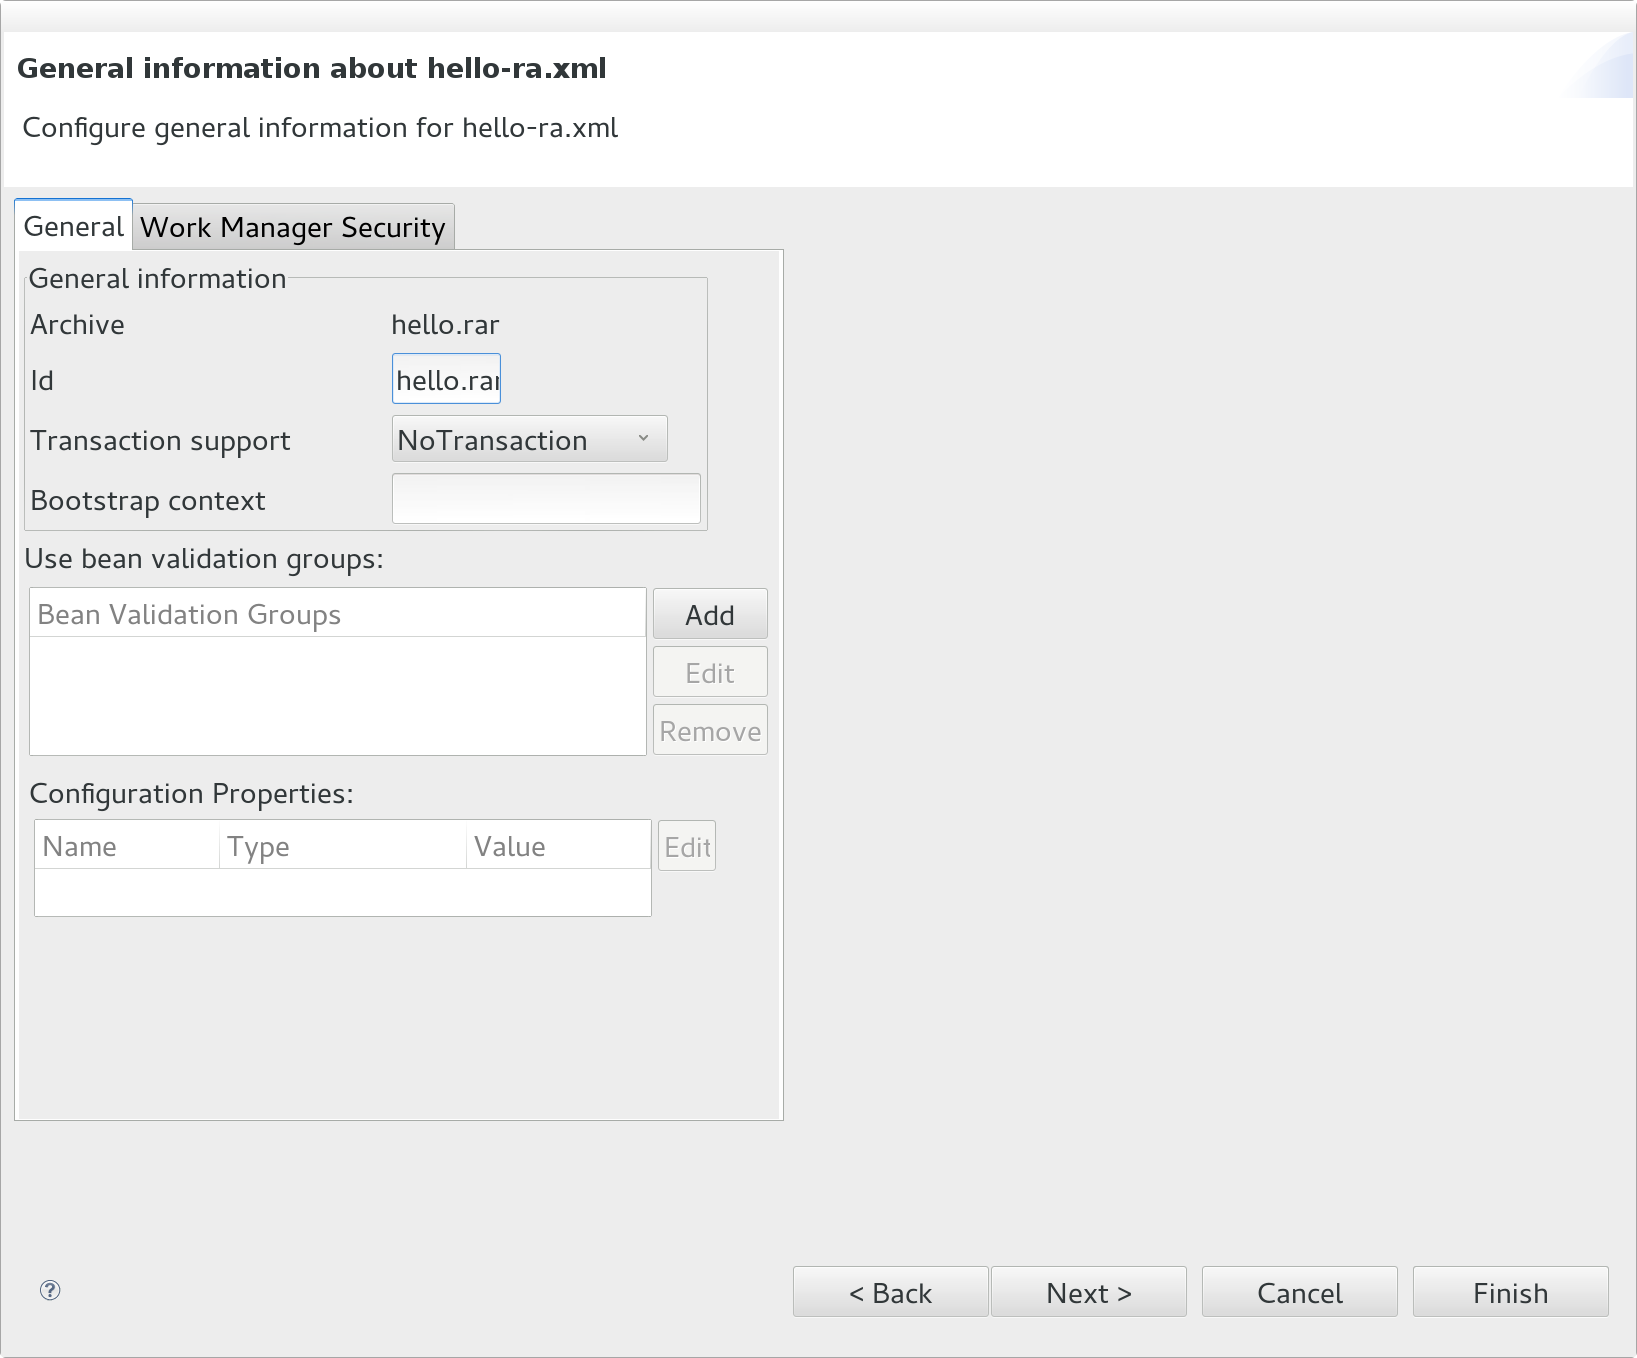
In the general information page, set up the transaction support, bootstrap context, bean validation groups and id if the version is 1.1+.
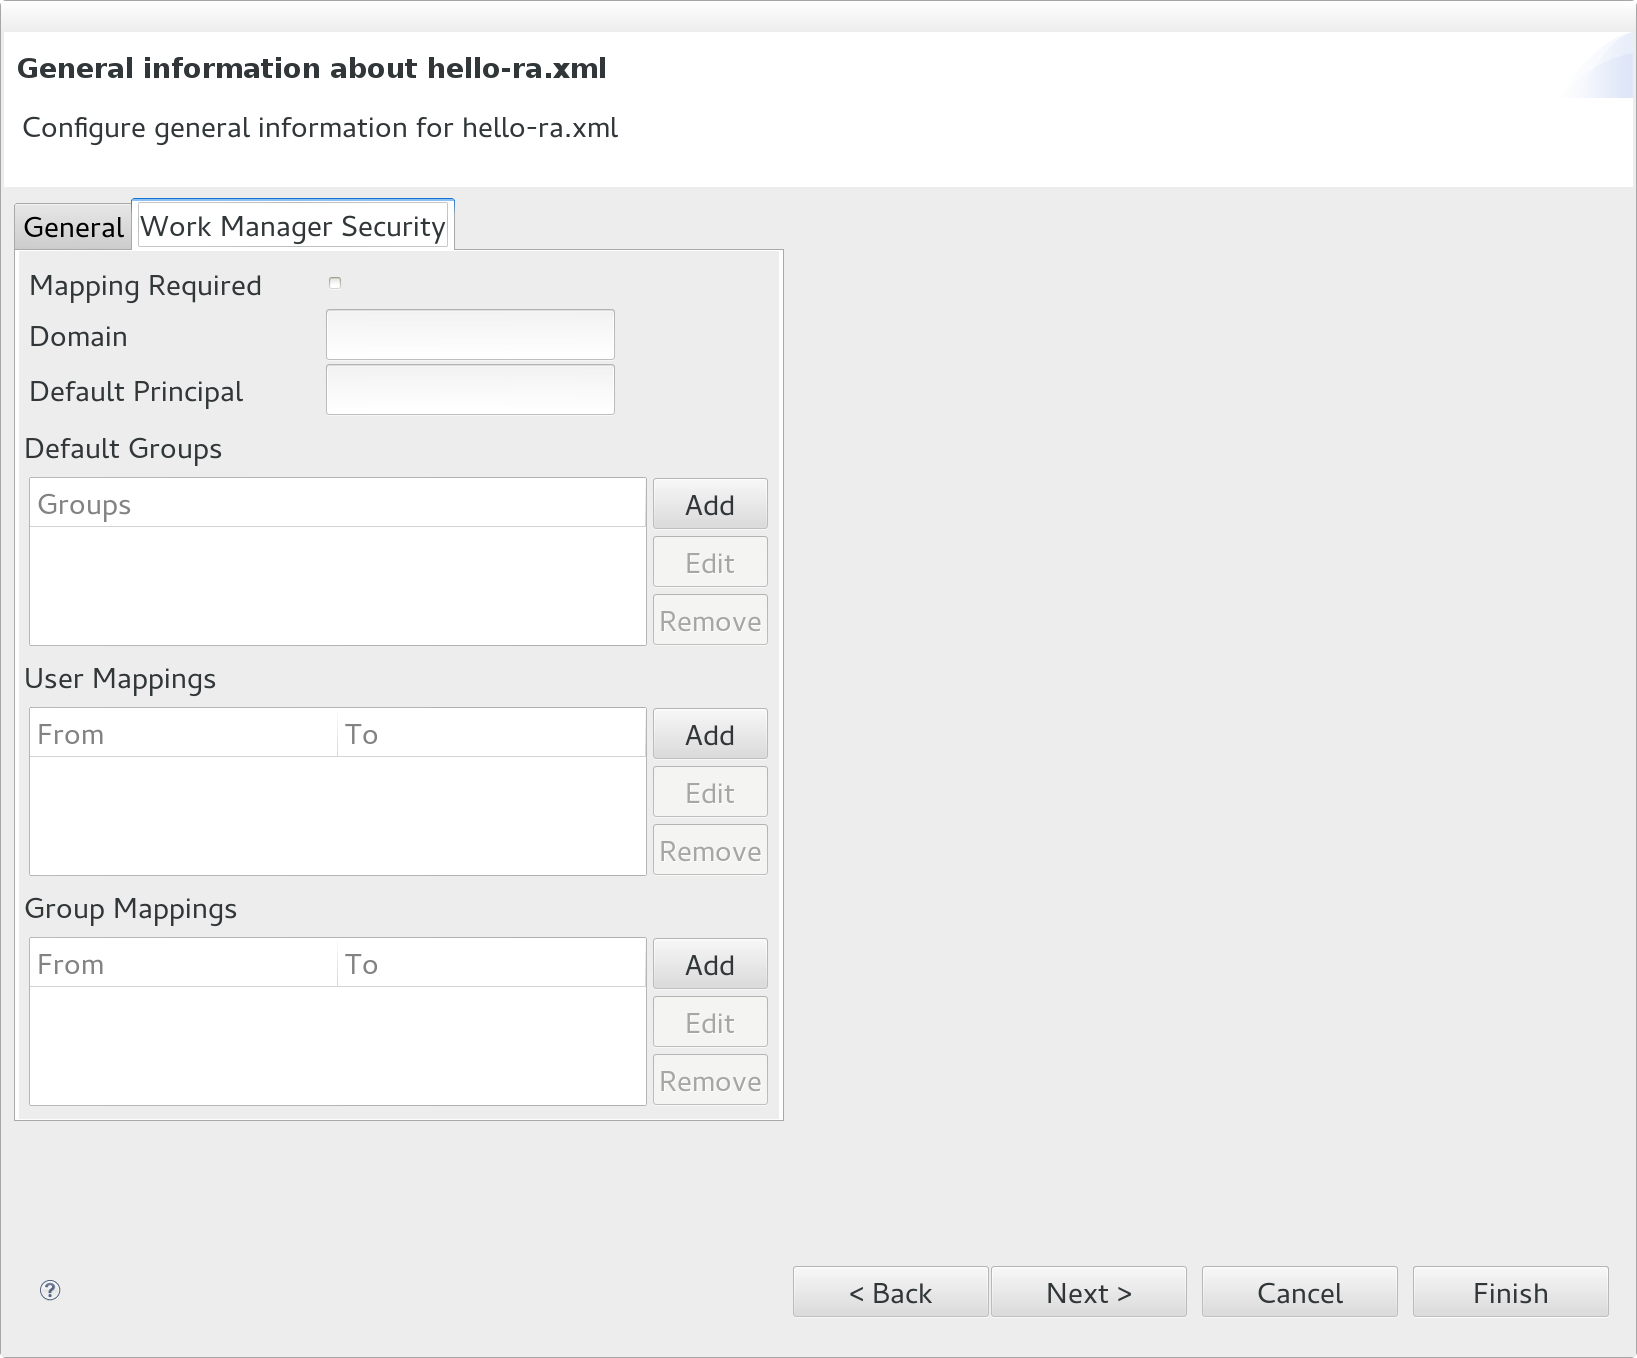
From IronJacamar 1.1, a workmanager tab is added to configure workmanager security mappings.
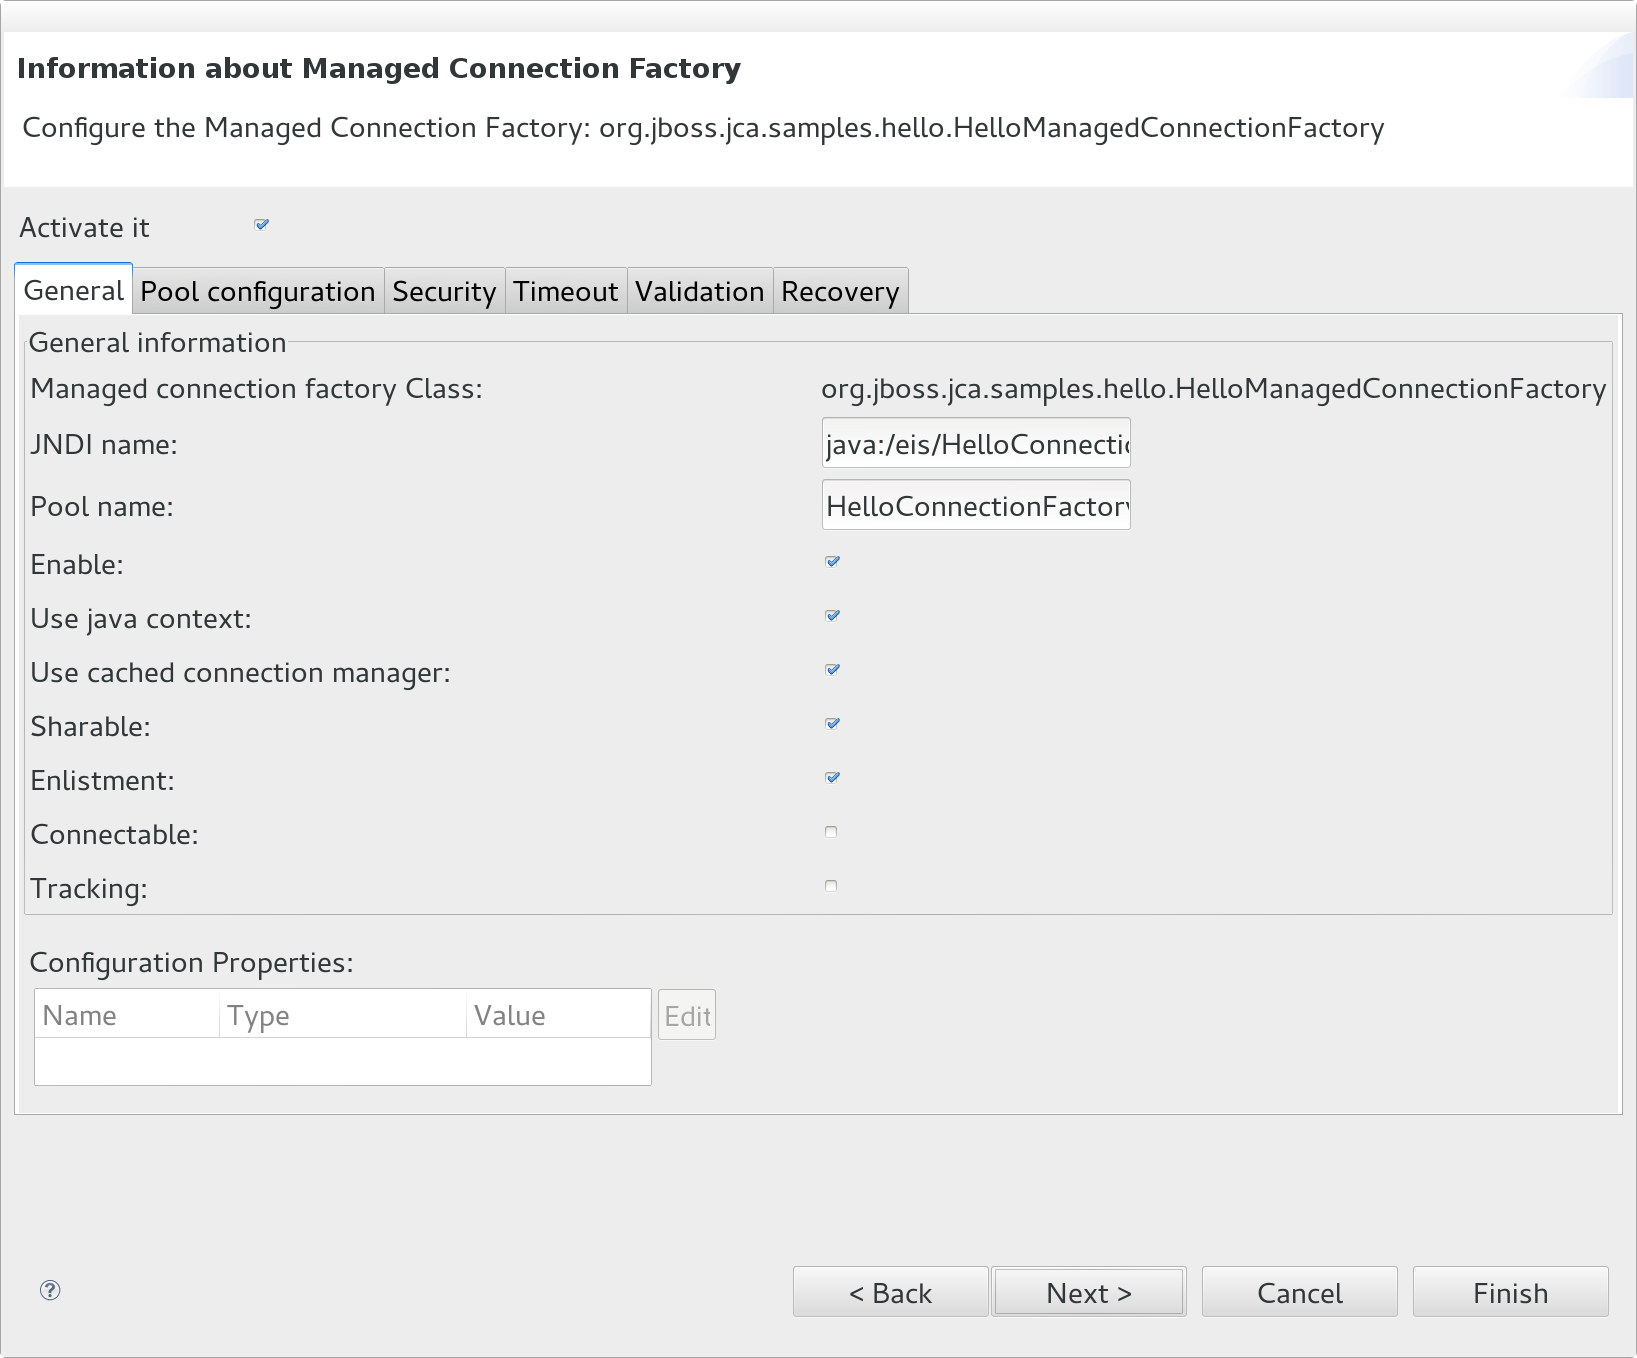
There is a wizard page for each ManagedConnectionFactory if the resource adapter is outbound or bidirectional.
The ManagedConnectionFactory can be activated by selecting the 'Activate' checkbox.
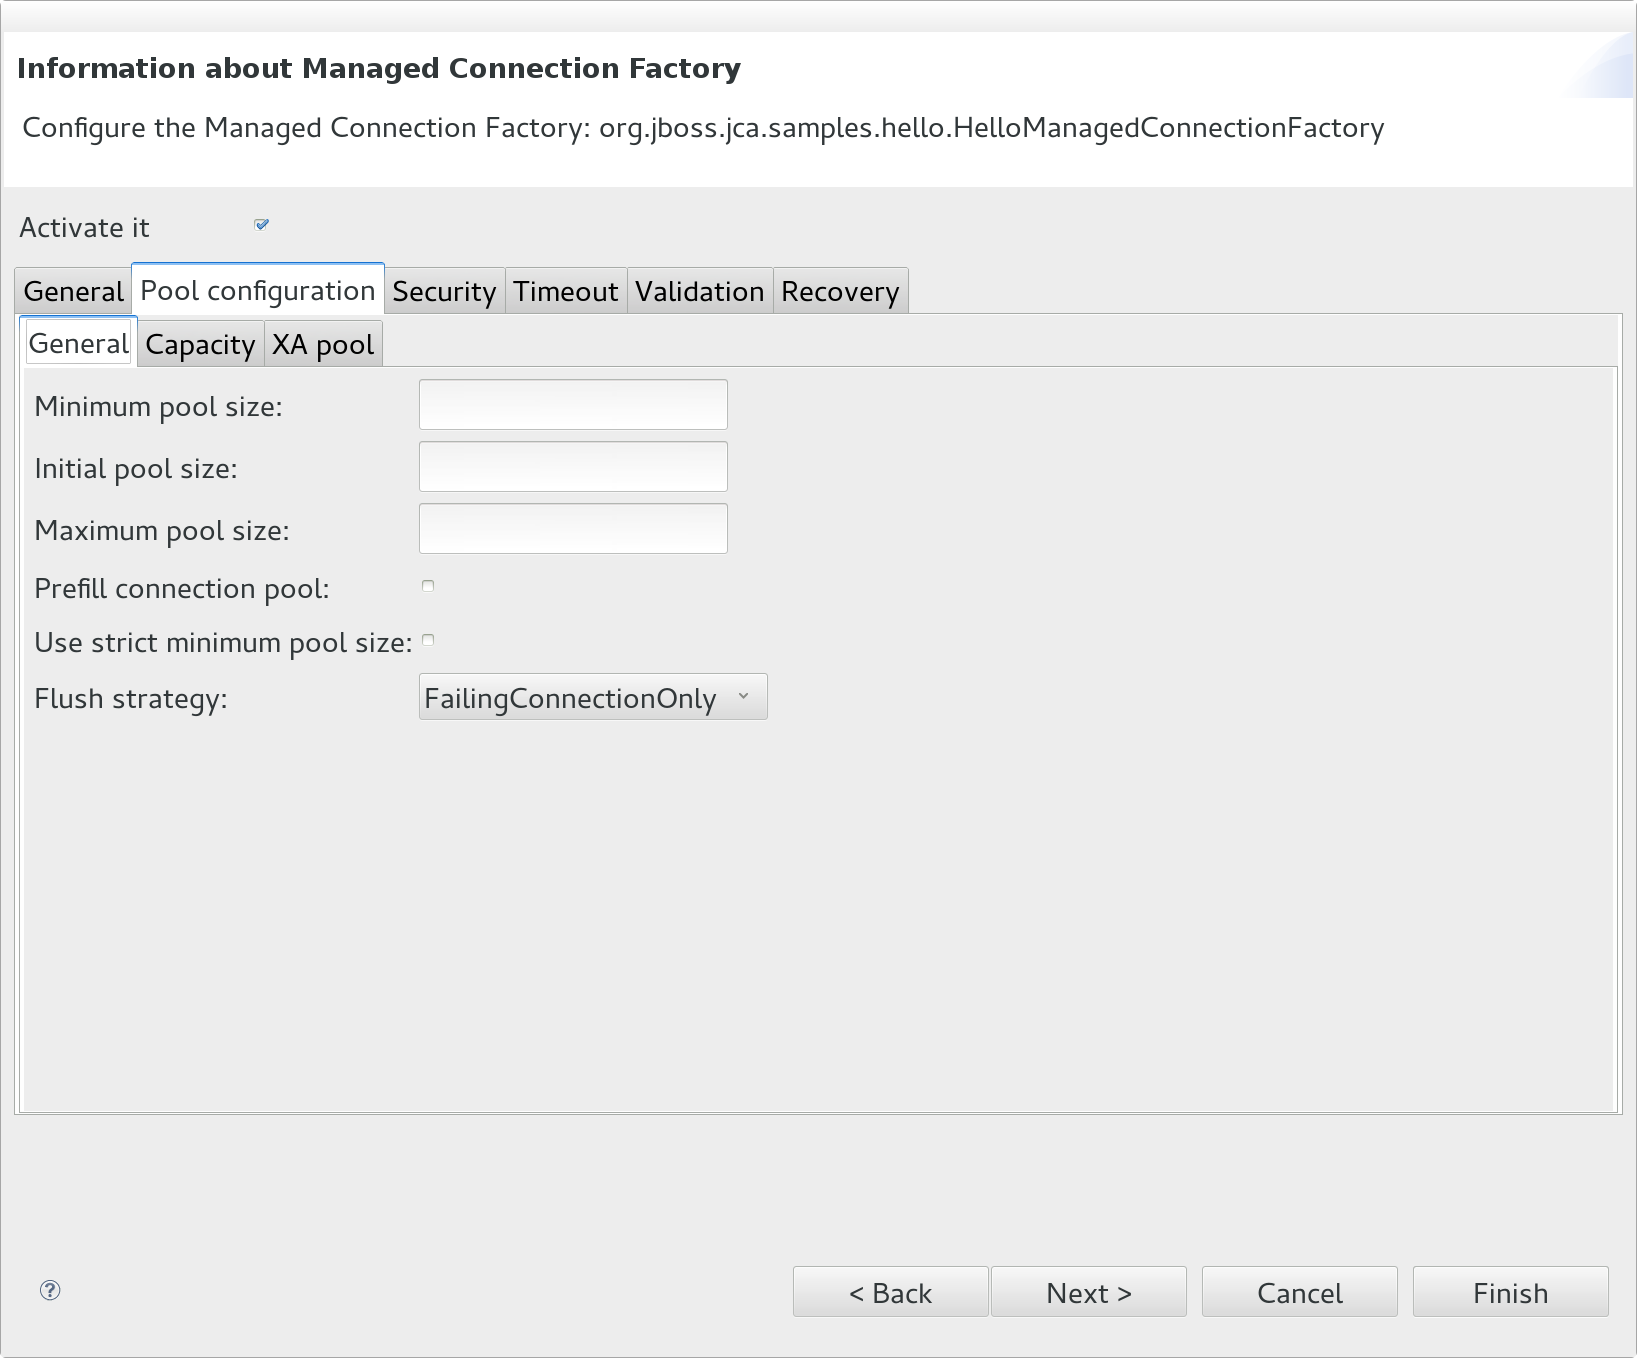
Configure connection pool in the 'pool configuration' tab.

Configure XA connection pool in the 'XA pool' sub tab.
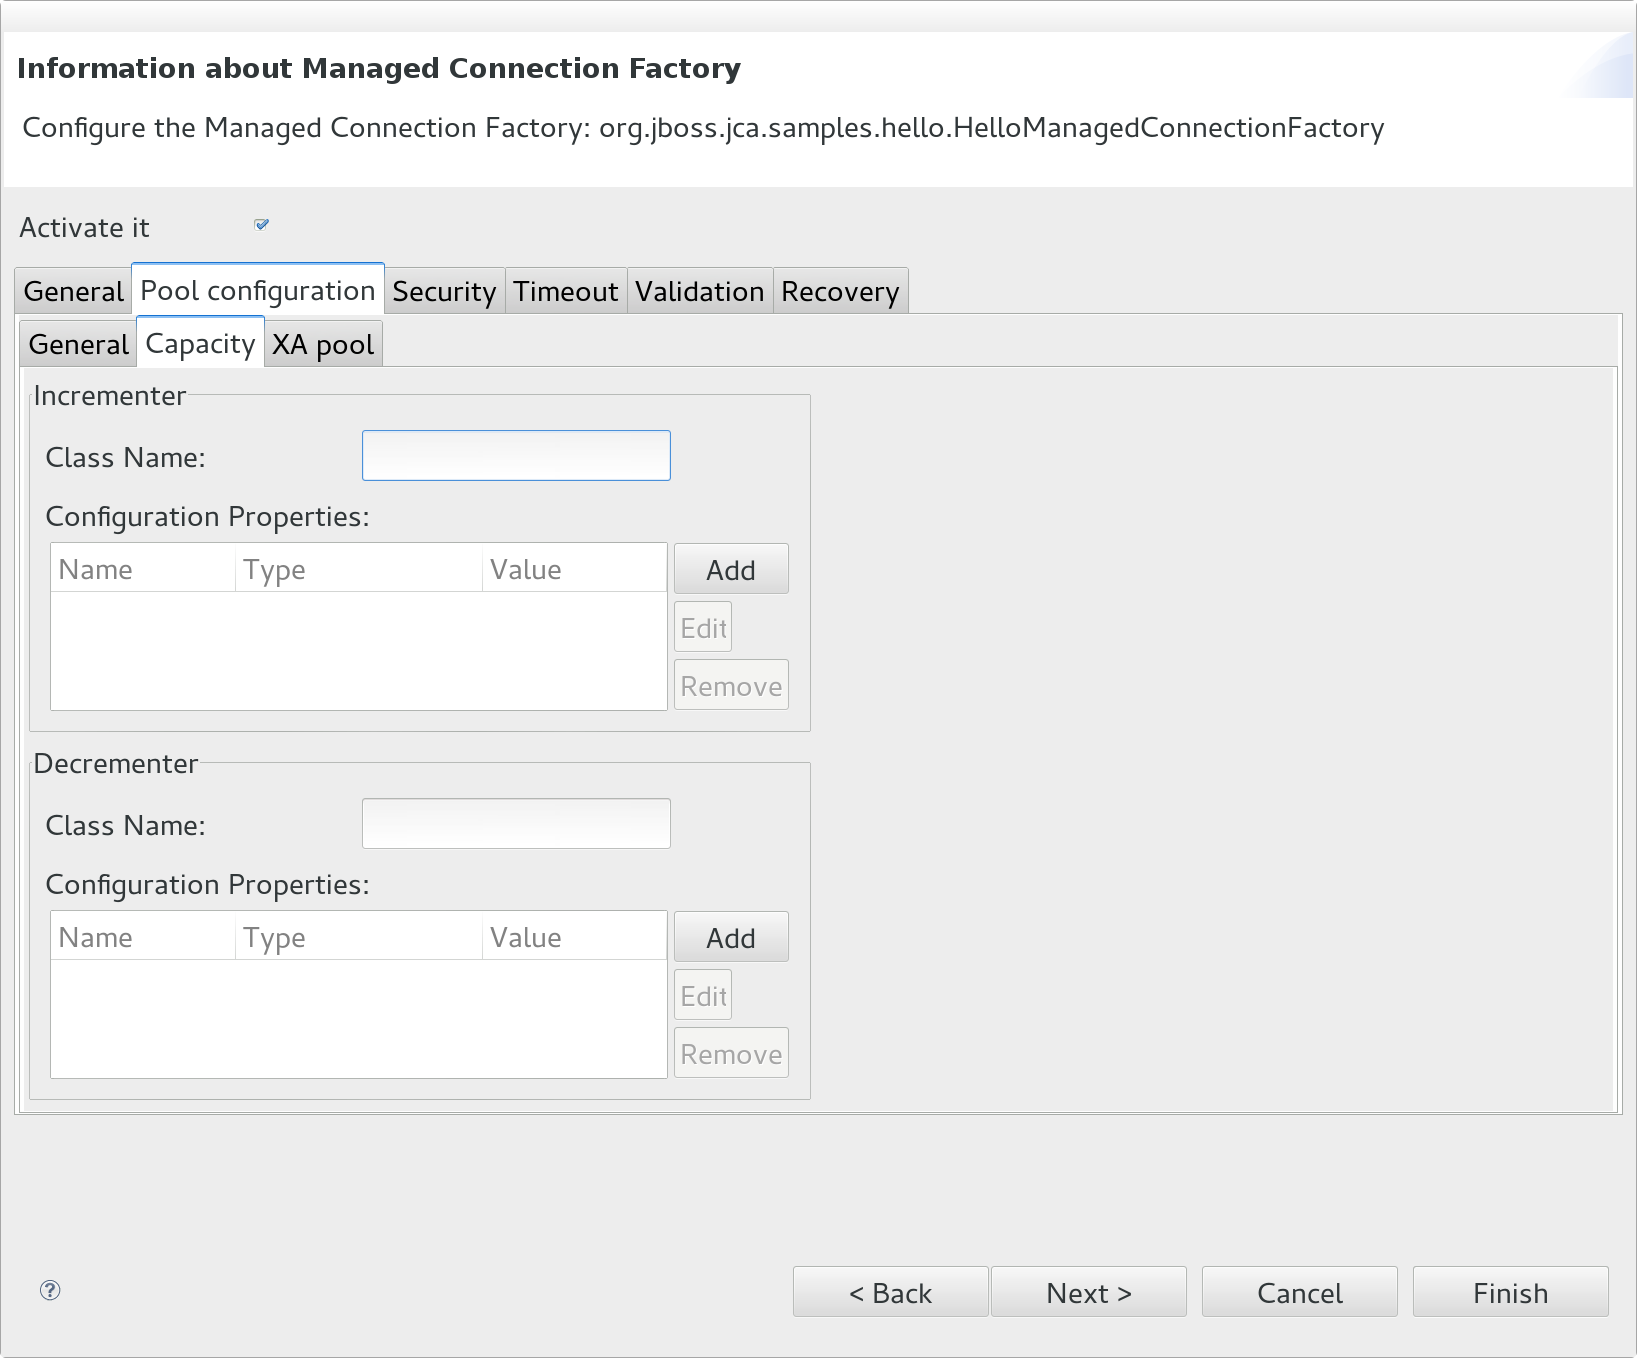
From IronJacamar 1.1 on, a capacity sub tab is added in 'pool configuration' tab to configure policy of connection pool
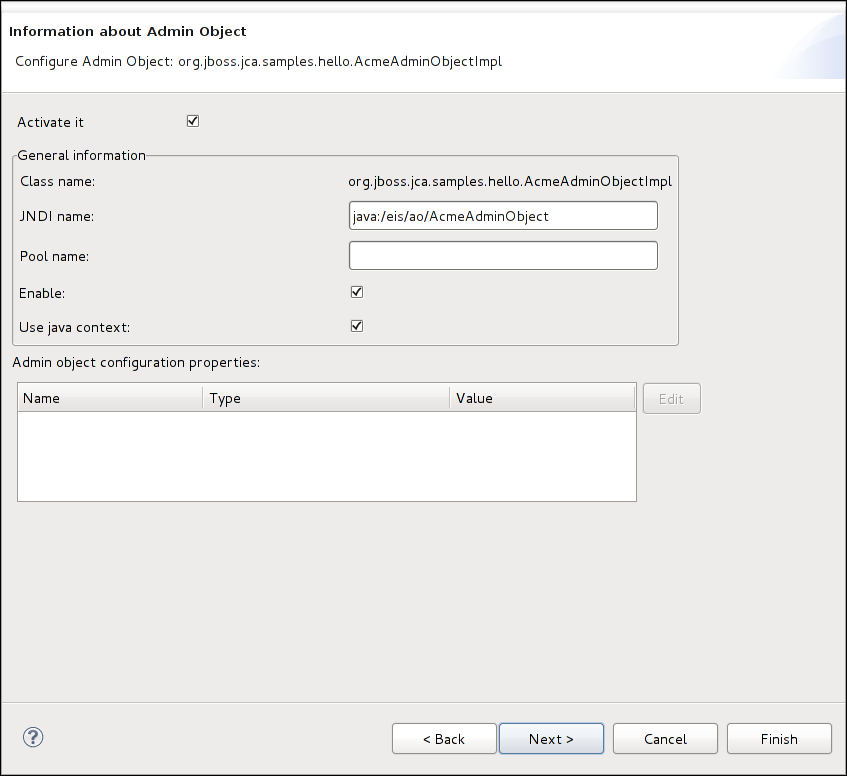
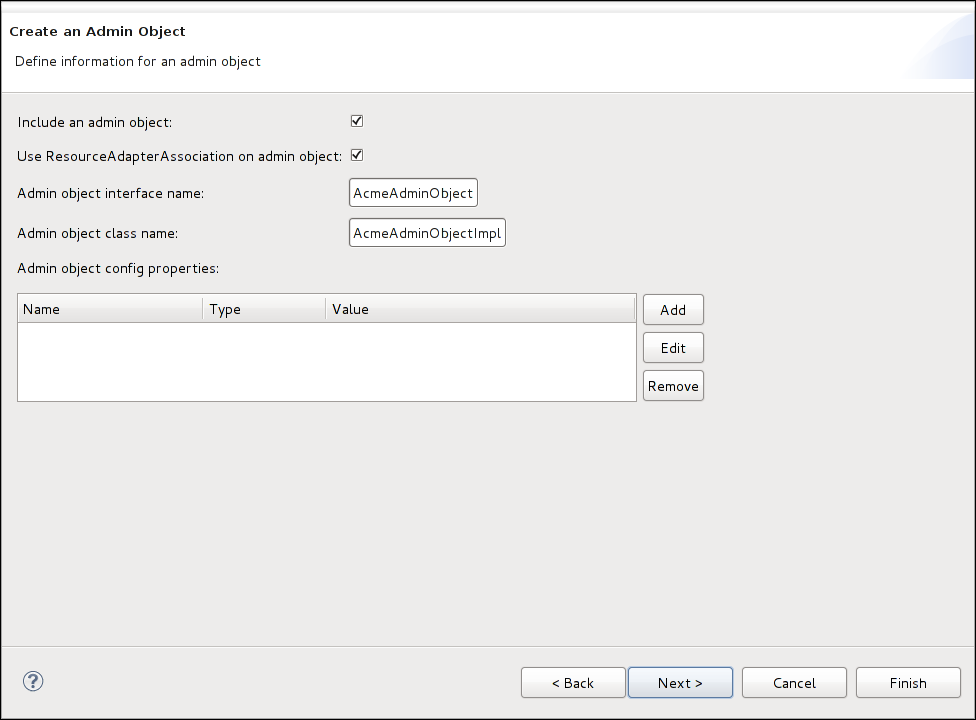
There is a wizard page for each AdminObject if the resource adapter includes one or more instances.
The AdminObject can be activated by selecting the 'Activate' checkbox.
There is a miscellaneous page also.
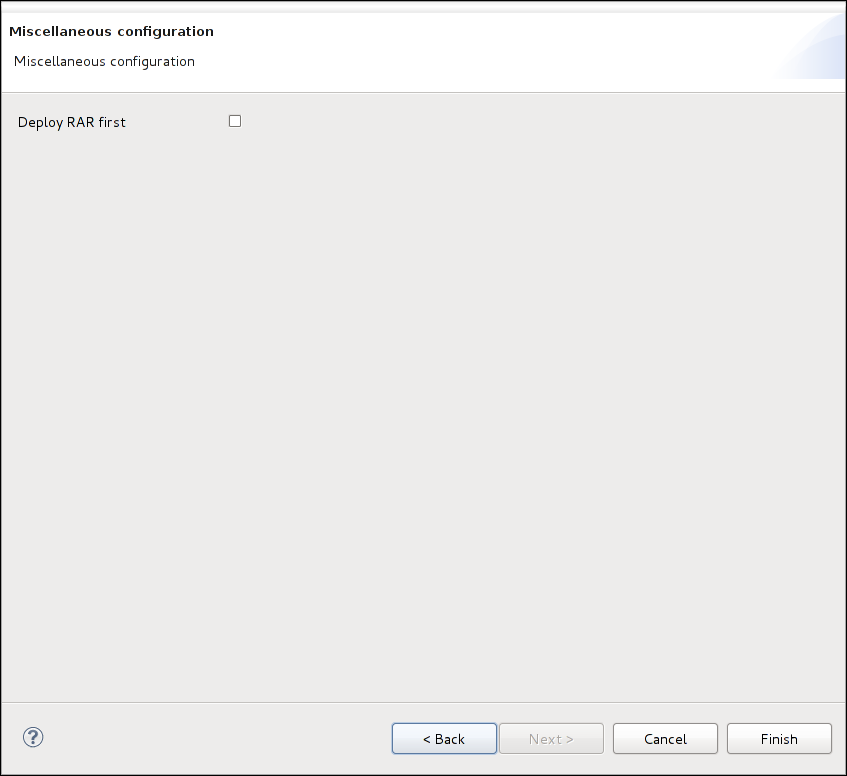
If the Deploy RAR first option is selected, the plugin will try to deploy the RAR file to the IronJacamar server first, then deploy the generated -ra.xml file.